A collection of helpful and easy to install bash scripts for the IBM i.
Setup
To setup these bash scripts and use them, just use the provided setup file at the root of this project.
cd /path/to/ibmi-bash-tools
./setup <optional-path>
The setup script accepts an option path to symlink the scripts. It will try to place the scripts in ~/bin by default.
Symlinking them allows them to be updated anytime the files in this project are updated. Wherever they end up being
symlinked, make sure that directory is in the user’s PATH BASH environment variable. This can be done like so in a
bash configuration like so:
A script that mimics the apachectl CLI on *nix
systems. It currently only has start, stop, and restart as implemented options. Unlike the original apachectl,
the user needs to specify a server to target, as the IBM i has multiple instances of Apache.
A script that behaves like other SQL CLIs. The user can repeatedly run SQL statements until they enter exit or exit;. It even supports history, so the user can use the up and down arrows to cycle through past SQl statements.
AirConnect: Send audio to UPnP/Sonos/Chromecast players using AirPlay
Use these applications to add AirPlay capabilities to Chromecast and UPnP (like Sonos) players, to make them appear as AirPlay devices.
AirConnect can run on any machine that has access to your local network (Windows, MacOS x86 and arm64, Linux x86, x86_64, arm, aarch64, sparc, mips, powerpc, Solaris and FreeBSD). It does not need to be on your main computer. (For example, a Raspberry Pi works well). It will detect UPnP/Sonos/Chromecast players, create as many virtual AirPlay devices as needed, and act as a bridge/proxy between AirPlay clients (iPhone, iPad, iTunes, MacOS, AirFoil …) and the real UPnP/Sonos/Chromecast players.
The audio, after being decoded from alac, can be sent in plain, or re-encoded using mp3, aac or flac. Most players will not display metadata (artist, title, album, artwork …) except when mp3 or aac re-encoding are used and for UPnP/DLNA devices that support icy protocol. Chromecast players support this after version 1.1.x
Installing
Pre-built binaries are in AirConnect-<X.Y.Z>.zip. It can be downloaded manually in a terminal by typing wget https://raw.githubusercontent.com/philippe44/AirConnect/master/airconnect-<X.Y.Z>.zip. Unzip the file an select the bianry that works for your system.
For Chromecast, the file is aircast-<os>-<cpu> (so aircast-macos-x86_64 for Chromecast on MacOS + Intel CPU)
For UPnP/Sonos, the file is airupnp-<os>-<cpu> (so airupnp-macos-arm64 for UPnP/Sonos on MacOS + arm CPU)
There is a “-static” version of each application that has all static libraries built-in. Use of these is (really) not recommended unless the regular version fails. For MacOS users, you need to install openSSL and do the following steps to use the dynamic load library version:
install openssl: brew install openssl. This creates libraries (or at least links) into /usr/local/opt/openssl[/x.y.z]/lib where optional ‘x.y.z’ is a version number
For Windows, install the Microsoft VC++ redistributable found here
You will also need to grab the 2 dlls files and put them in the same directory as the exe file
Store the <executable> (e.g. airupnp-linux-aarch64) in any directory.
On non-Windows machines, open a terminal and change directories to where the executable is stored and run chmod +x <executable> (Example: chmod +x airupnp-macos). File permissions might need to be set.
Don’t use firewall or set ports using options below and open them.
Port 5353 (UDP) is needed to listen to mDNS messages
Each device uses 1 port permanently (RTSP) and when playing adds 1 port for HTTP and 3 ports for RTP (use -gor <ports> parameter, default is random)
UPnP adds one extra port for discovery (use -b or <upnp_socket> parameter, default is 49152 and user value must be above this)
In Docker, you must use ‘host’ mode to enable audio webserver. Note that you can’t have a NAT between your devices and the machine where AirConnect runs.
Running
Double click the <executable> or launch it by typing ./<executable> in the same command line window.
For Sonos & Heos players, set latency by adding -l 1000:2000 on the command line. (Example: ./airupnp-macos -l 1000:2000)
You should start to see lots of log messages on screen. Using your iOS/Mac/iTunes/Airfoil/other client, you should now see new AirPlay devices and can try to play audio to them.
If it works, type exit, which terminates the executable, and then, on non-Windows/MacOS machines, relaunch it with -z so that it can run in the background and you can close the command line window. You can also start it automatically using any startup script or a Linux service as explained below. Nothing else should be required, no library or anything to install.
For each platform, there is a normal and a ‘-static’ version. This one includes all libraries directly inside the application, so normally there is no dependence to 3rd party shared libraries, including SSL. You can try it if the normal fails to load (especially on old systems), but static linkage is a blessing a curse (exact reasons out of scope of this README). Now, if the static version still does not work, there are other solutions that are pretty technical, see here. Best is that you open an issue if you want help with that.
Common information:
Use -h for command line details
When started in interactive mode (w/o -Z or -z option) a few commands can be typed at the prompt
exit
save <file> : save the current configuration in file named [name]
Volume changes made in native control applications are synchronized with AirPlay client
Pause, Stop, Next, Prev using native control application are sent to AirPlay client – once paused, “native” play will not work
Re-scan for new / lost players happens every 30s
A config file (default config.xml) can be created for advanced tweaking (a reference version can be generated using the -i <file> command line)
Chromecast groups are supported. Use -v to set the media volume factor for all devices (0.5 by default)
use -c mp3[:<rate>]|aac[:<rate>]|flac[:0..9]|wav|pcm to set codec use for re-encoding audio
When you have more than one ethernet card, you case use -b [ip] to set what card to bind to. Note that 0.0.0.0 is not authorized
Use -u <version> to set the maximum UPnP searched version
Use -b [ip|iface][:port] to set network interface (ip@ or interface name as reported by ifconfig/ipconfig) to use and, for airupnp only, UPnP port to listen to (must be above the default 49152)
Use -a <port>[:<count>] to specify a port range (default count is 128, sets RTP and HTTP ports)
Use -g -3|-1|0| to tweak http transfer mode where -3 = chunked, -1 = no content-length and 0 = fixed (dummy) length (see “HTTP content-length” below)”
Use -N "<format>" to change the default name of AirPlay players (the player name followed by ‘+’ by default). It’s a C-string format where ‘%s’ is the player’s name, so default is “%s+”
Use of -z disables interactive mode (no TTY) and self-daemonizes (use -p <file> to get the PID). Use of -Z only disables interactive mode
Do not daemonize (using & or any other method) the executable w/o disabling interactive mode (-Z), otherwise it will consume all CPU. On Linux, FreeBSD and Solaris, best is to use -z. Note that -z option is not available on MacOS or Windows
A ‘click’ noise can be heard when timings are adjusted by adding or skipping one 8ms frame. Use -r to disable such adjustements (or use <drift> option in config file), but that might cause overrun or underrun on long playbacks
This is an audio-only application. Do not expect to play a video on your device and have the audio from UPnP/Sonos or ChromeCast synchronized. It does not, cannot and will not work, regardless of any latency parameter. Please do not open tickets requesting this (see details below to understand why)
Config file parameters
The default configuration file is config.xml, stored in the same directory as the <executable>. Each of parameters below can be set in the <common> section to apply to all devices. It can also be set in any <device> section to apply only to a specific device and overload the value set in <common>. Use the -x <config>command line option to use a config file of your choice.
latency <[rtp][:http][:f]> : (default: (0:0))buffering tweaking, needed when audio is shuttering or for bad networks (delay playback start)
[rtp] : ms of buffering of RTP (AirPlay) audio. Below 500ms is not recommended. 0 = use value from AirPlay. A negative value force sending of silence frames when no AirPlay audio has been received after ‘RTP’ ms, to force a continuous stream. If not, the UPnP/CC player will be not receive audio and some might close the connection after a while, although most players will simply be silent until stream restarts. This shall not be necessary in most of the case.
[http] : ms of buffering silence for HTTP audio (not needed normaly, except for Sonos)
[f] : when network congestion happens, source frames will not be received at all. Set this parameter to force sending silence frame then. Otherwise, no HTTP data will be sent and player might close the connection
drift <0|1> : enable adding or dropping a frame when case source frames producion is too fast or too slow
enabled <0|1> : in common section, enables new discovered players by default. In a dedicated section, enables the player
name : The name that will appear for the device in AirPlay. You can change the default name.
upnp_max : set the maximum UPnP version use to search players (default 1)
http_length : same as -g command line parameter
metadata <0|1> : send metadata to player (only for mp3 and aac codecs and if player supports ICY protocol)
artwork : an URL to an artwork to be displayed on player
flush <0|1> : (default 1) set AirPlay FLUSH commands response (see also –noflush in Misc tips section)
media_volume <0..1> : (default 0.5) Applies a scaling factor to device’s hardware volume (chromecast only)
codec <mp3[:<bitrate>]|aac[:<bitrate>]|flac[:0..9]|wav|pcm> : format used to send HTTP audio. FLAC is recommended but uses more CPU (pcm only available for UPnP). For example, mp3:320 for 320Kb/s MP3 encoding.
These are the global parameters
max_players : set the maximum of players (default 32)
log_limit <-1 | n> : (default -1) when using log file, limits its size to ‘n’ MB (-1 = no limit)
ports <port>[:<count>] : set port range to use (see -a)
Start automatically in Linux
Create a file in /etc/systemd/system, e.g. airupnp.service with the following content (assuming the airupnp binary is in /var/lib/airconnect)
Where [path] is the path where you’ve stored the aircast executable (without the []). It can be for example Users/xxx/airconnect where xxx is your user name
Start automatically under Windows
There are many tools that allow an application to be run as a service. You can try this one
Synology installation
@eizedev is now maitaining a package for automatic installation & launch of airupnp on Syno’s here
Player specific hints and tips
Sonos
The upnp version is often used with Sonos players. When a Sonos group is created, only the master of that group will appear as an AirPlay player and others will be removed if they were already detected. If the group is later split, then individual players will re-appear.
When changing volume of a group, each player’s volume is changed trying to respect the relative values. It’s not perfect and stil under test now. To reset all volumes to the same value, simply move the cursor to 0 and then to the new value. All players will have the same volume then. You need to use the Sonos application to change individual volumes.
To identify your Sonos players, pick an identified IP address, and visit the Sonos status page in your browser, like http://192.168.1.126:1400/support/review. Click Zone Players and you will see the identifiers for your players in the UUID column.
Bose SoundTouch
@chpusch has found that Bose SoundTouch work well including synchonisation (as for Sonos, you need to use Bose’s native application for grouping / ungrouping). I don’t have a SoundTouch system so I cannot do the level of slave/master detection I did for Sonos
Pioneer/Phorus/Play-Fi
Some of these speakers only support mp3
Misc tips
When players disappear regularly, it might be that your router is filtering out multicast packets. For example, for a Asus AC-RT68U, you have to login by ssh and run echo 0 > /sys/class/net/br0/bridge/multicast_snooping but it does not stay after a reboot.
Lots of users seems to have problem with Unify and broadcasting / finding players. Here is a guide https://www.neilgrogan.com/ubnt-sonos/ made by somebody who fixes the issue for his Sonos
Some AirPlay controller send a FLUSH and immediately start sending new audio when skipping track. This causes AirConnect to issue a STOP and almost immediately a PLAY command which seems to be a problem for certain players (Sonos in some cases). A possible workaround is to ignore FLUSH request (see config file or use –noflush on the command line) but this has side effect on pause as silence frames are sent. At best restart is delayed and worse case it might not work with some codec (flac)
Some older Avahi distributions grab the port mDNS port 5353 for exclusive use, preventing AirConnect to respond to queries. Please set disallow-other-stacks=noin /etc/avahi/avahi-daemon.conf
If the non-static version fails to load complaining that GLIBCXX_3.4.29 is missing, please have a look there and use the existing libraries I’ve provided in that repository. You can simply copy the right libstdc++.so.6.0.29 in the directory where AirConnect is and create symlink for libstdc++.so and libstdc++.so.6, then use the LD_LIBRARY_PATH='$ORIGIN' <app> trick, it will work without messing anything in your system.
HTTP & UPnP specificities
HTTP content-length and transfer modes
Lots of UPnP player have very poor quality HTTP and UPnP stacks, in addition of UPnP itself being a poorly defined/certified standard. One of the main difficulty comes from the fact that AirConnect cannot provide the length of the file being streamed as the source is an infinite real time RTP flow coming from the AirPlay source.
The HTTP standard is clear that the “content-length” header is optional and can be omitted when server does not know the size of the source. If the client is HTTP 1.1 there is another possibility which is to use “chunked” mode where the body of the message is divided into chunks of variable length. This is explicitely made for case of unknown source length and an HTTP client that claims to support 1.1 must support chunked-encoding.
The default mode of AirUPnP is “no content-length” (<http_length> = -1) but unfortunately, some players can’t deal with that. You can then try “chunked-encoding” (<http_length> = -3) but some players who claim to be HTTP 1.1 do not support it. There is a last resort option to add a large fake content-length (<http_length> = 0). It is set to 2^31-1, so around 5 hours of playback with flac re-encoding. Note that if player is HTTP 1.0 and http_header is set to -3, AirUPnP will fallback no content-length. The command line option -g has the same effect that <http_length> in the <common> section of a config file.
This might still not work as some players do not understand that the source is not a randomly accessible (searchable) file and want to get the first(e.g.) 128kB to try to do some smart guess on the length, close the connection, re-open it from the beginning and expect to have the same content. I’m trying to keep a buffer of last recently sent bytes to be able to resend-it, but that does not always works. Normally, players should understand that when they ask for a range and the response is 200 (full content), it means the source does not support range request but some don’t (I’ve tried to add a header “accept: no-range but that makes things worse most of the time).
Delay when switching track or source
I’ve received that question many times: why is there (sometimes) many seconds of delay when I switch track (or source) from my iPhone before I hear the change?
To understand, it’s better that you read the next paragraph, but as you probably won’t, here is a quick summary of how AirPlay works. As far as the sender (e.g. your iPhone) is concerned, once the connection with an AirPlay ‘speaker’ is established, this connection is almost like a analogue wire with a delay (buffer) of 1 or 2 seconds.
What iOS does nowadays is that when you switch between tracks, instead of closing the connection and re-creating one, it just pushes the new audio through the existing connection, so you might have the 1~2 seconds of previous audio in the pipe before the new audio plays. Same thing when stopping/pausing playback, iOS simply stops pushing audio through the wire.
There is a function to “flush” the audio in the pipe so that new audio plays immediately, but I’ve seen that recent versions of iOS don’t use it anymore (or some applications decide to not flush while they could). That’s not a big deal with most AirPlay speakers, it’s a 1~2 second delay.
But with AirConnect, the AirPlay speaker is not a speaker, it’s a UPnP or Chromecast player. They do not at all act like virtual wires, they instead expect to have the whole track available as a file and retrieve data from it as needed. In fact, one of the key functions that AirConnect does is looking like a wire to iPhone and looking like a file to the UPnP/CC.
Usually, UPnP/CC players consume a large chunk of that ‘file’ before they start to play to handle network congestion, but some don’t and simply start playing at the first received byte, counting that the large chunk will come quickly. But that chunk/buffer does not exist for AirConnect as audio is produced in real time by the iPhone. So if a player starts at the first byte, it will very likely lack audio data when a network congestion occurs and playback will stutter. The parameter http latency solves this issue by creating a silence buffer sent in a burst when establishing a connection, but this creates a permanent delay between the iPhone and the player. Some UPnP/CC players wait to have buffered enough data before they start playing and again, because that data is built in real time by AirConnect, this other delay adds up to the latency parameter (even if http latency is 0).
When you switch between tracks or sources (or pause/stop), if your iPhone sends this “flush” command, then AirConnect immediately stops the UPnP/CC player. But if there is no flush command, it will play until these silence + self buffers are consumed … that can be more than a few seconds.
In addition the delay can increase with time depending of clock speed difference between the iPhone and the UPnP/CC. Say that the iPhone’s clock is 1% faster than the player’s clock, then when it has produced 300s (5mins) of audio, the player has received it all but it has only played 297s, so there is an additional delay of 3s. If the iPhone moves track without the flush command, then the UPnP/CC player will start playing new audio (or stop) http latency + self-buffer length + 3 seconds later … that can be a lot!
Unfortunately, there is nothing I can do about that. By not using the “flush” command, iOS or application using AirPlay create an issue that AirConnect has no way to identify or avoid.
Latency parameters explained:
These bridges receive realtime “synchronous” audio from the AirPlay controller in the format of RTP frames and forward it to the Chromecast/UPnP/Sonos player in an HTTP “asynchronous” continuous audio binary format (notion of frames does not exist on that side). In other words, the AirPlay clients “push” the audio using RTP and the Chromecast/UPnP/Sonos players “pull” the audio using an HTTP GET request.
A player using HTTP to get its audio expects to receive an initial large portion of audio as the response to its GET and this creates a large enough buffer to handle most further network congestion/delays. The rest of the audio transmission is regulated by the player using TCP flow control. But when the source is an AirPlay RTP device, there is no such large portion of audio available in advance to be sent to the Player, as the audio comes to the bridge in real time. Every 8ms, a RTP frame is received and is immediately forwarded as the continuation of the HTTP body. If the CC/UPnP/Sonos players starts to play immediately the 1st received audio sample, expecting an initial burst to follow, then any network congestion delaying RTP audio will starve the player and create shuttering.
The [http] parameter allow a certain amount of silence frames to be sent to the Chromecast/UPnP/Sonos player, in a burst at the beginning. Then, while this “artificial” silence is being played, it’s possible for the bridge to build a buffer of RTP frames that will then hide network delays that might happen in further RTP frames transmission. This delays the start of the playback by [http] ms.
But RTP frames are transmitted using UDP, which means there is no guarantee of delivery, so frames might be lost from time to time (happens often on WiFi networks). To allow detection of lost frames, they are numbered sequentially (1,2 … n) so every time two received frames are not consecutive, the missing ones can be requested again by the AirPlay receiver.
Normally, the bridge forwards immediately every RTP frame using HTTP and again, in HTTP, the notion of frame numbers does not exit, it’s just the continuous binary audio. So it’s not possible to send audio non-sequentially when using HTTP
For example, if received RTP frames are numbered 1,2,3,6, this bridge will forward (once decoded and transformed into raw audio) 1,2,3 immediately using HTTP but when it receives 6, it will re-request 4 and 5 to be resent and hold 6 while waiting (if 6 were to be transmitted immediately, the Chromecast/UPnP/Sonos will play 1,2,3,6 … not nice). The [rtp] parameter sets for how long frame 6 shall be held before adding two silence frames for 4 and 5 and send sending 4,5,6. Obviously, if this delay is larger than the buffer in the Chromecast/UPnP/Sonos player, playback will stop by lack of audio. Note that [rtp] does not delay playback start.
When [f] is set, silence frames will be inserted as soon as no RTP frames have been received during [rtp] ms. This ensure that a continuous stream of audio is available on the HTTP server. This might be necessary for some players that close the HTTP connection if they have not received data for some time. It’s unlikely though. Note that otherwise when RTP stream is interrupted for more than [http] ms, the UPnP/CC player will stop anyway as it will have empty buffers. Still, as soon as the RTP stream resumes, the bridge will receive frame N, where the last received one might be N-500. So it will request the (up to) [rtp] missing ones (might be less than 500), and restart playing at N-[http], so potentially silence will be inserted.
Many have asked for a way to do video/audio synchronisation so that UPnP (Sonos) players can be used as speakers when playing video on a computer or tablet (YouTube for example). Due to this RTP-to-HTTP bridging, this cannot be done as the exact time when an audio frame is played cannot be controlled on the HTTP client. AirPlay speakers can achieve that because the iPhone/iPad/MAC player will “delay” the video by a known amount, send the audio in advance (usually 2 sec) and then control the exact time when this audio is output by the speaker. But although AirConnect has the exact request timing and maintains synchronization with the player, it cannot “relay” that synchronization to the speakers. UPnP protocol does not allow this and Sonos has not made their protocol public. Sometimes you might get lucky because the video-to-audio delay will almost match the HTTP player delay, but it is not reproductible and will not be stable over time.
Compiling from source
It’s a Makefile-oriented build, and there is a bash script (built.sh) and Windows one (build.cmd). The bash script is intended for cross-platform build and you might be able to call directly your native compiler, but have a look at the command line in the build.sh to make sure it can work.
Please see here to know how to rebuild my apps in general:
Otherwise, you can just get the source code and pre-built binaries:
cd ~
git clone http://github.com/philippe44/airconnect
cd ~/airconnect
git submodule update --init
NB: you can speed up all clonings by a lot by adding --depth 1 option to just to a shallow clone (you probably don’t need all the commits)
DNSSeeder exposes a list of known peers to any new peer joining the Kaspa network via the DNS protocol.
When DNSSeeder is started for the first time, it will connect to the kaspad node
specified with the -s flag and listen for addr messages. These messages
contain the IPs of all peers known by the node. DNSSeeder will then connect to
each of these peers, listen for their addr messages, and continue to traverse
the network in this fashion. DNSSeeder maintains a list of all known peers and
periodically checks that they are online and available. The list is stored on
disk in a json file, so on subsequent start ups the kaspad node specified with
-s does not need to be online.
When DNSSeeder is queried for node information, it responds with details of a
random selection of the reliable nodes it knows about.
It is written in Go (golang).
This project is currently under active development and is in Beta state.
Ensure Go was installed properly and is a supported version:
Launch a kaspad node for the DNSSeeder to connect to
$ go version
$ go env GOROOT GOPATH
NOTE: The GOROOT and GOPATH above must not be the same path. It is
recommended that GOPATH is set to a directory in your home directory such as
~/dev/go to avoid write permission issues. It is also recommended to add
$GOPATH/bin to your PATH at this point.
Run the following commands to obtain dnsseeder, all dependencies, and install it:
dnsseeder will now be installed in either $GOROOT/bin or
$GOPATH/bin depending on your configuration. If you did not already
add the bin directory to your system path during Go installation, we
recommend you do so now.
To start dnsseeder listening on udp 127.0.0.1:5354 with an initial connection to working testnet node running on 127.0.0.1:
You will then need to redirect DNS traffic on your public IP port 53 to 127.0.0.1:5354
Note: to listen directly on port 53 on most Unix systems, one has to run dnsseeder as root, which is discouraged
Setting up DNS Records
To create a working set-up where the DNSSeeder can provide IPs to kaspad instances, set the following DNS records:
NAME                        TYPE        VALUE
----                        ----        -----
[your.domain.name]          A           [your ip address]
[ns-your.domain.name]       NS          [your.domain.name]
Streamlit project to test Selenium running in Streamlit Cloud runtime.
Local Windows 10 machine works
Local Docker container works
Streamlit Cloud runtime works, see example app here:
Issues 🐛
Example fails on Streamlit Cloud with a TimeoutException, due to a 403 response, because GeoIP blocking is active on the target website. Therefore a proxy can be enabled optionally to bypass this.
However, the proxies are not very reliable, because only free proxies are used here. Therefore, the example is not very stable with enabled proxies and can fail sometimes. Sometimes, no proxies are available.
ToDo ☑️
improve example
fix proxy issues
try also undetected_chromedriver package
try also seleniumbase package
Problem 🤔
The suggestion for this repo came from a post on the Streamlit Community Forum.
It is not that easy to install and use Selenium based webscraper in container based environments.
On the local computer, this usually works much more smoothly because a browser is already installed and can be controlled by the associated webdriver.
In container-based environments, however, headless operation is mandatory because no UI can be used there.
Therefore, in this repository a small example is given to get Selenium working on:
Local Windows 10 machine
Local Docker container that mimics the Streamlit Cloud runtime
Streamlit Community Cloud runtime
Proxy 😎
Because some websites block requests based on countries (aka geoip blocking) or from certain IP ranges, a proxy can be used to bypass this. The example app has a checkbox to enable a proxy. You can choose between socks4 and socks5 proxies. However, socks4 does not work at all. The socks5 proxy is a free socks5 proxy from a public list and is not very reliable. Therefore, the example is not very stable with enabled proxies and can fail quite often.
Pitfalls 🚩
To use Selenium (even headless in a container) you need always two components to be installed on your machine:
A webbrowser and its associated webdriver.
The version of the headless webbrowser and its associated webdriver must always match.
If your are using Selenium in a docker container or on Streamlit Cloud, the --headless option is mandatory, because there is no graphical user interface available.
There are three options of webbrowser/webdriver combinations for Selenium:
chrome & chromedriver
chromium & chromedriver
firefox & geckodriver
Unfortunately in the default Debian Bullseye apt package repositories, not all of these packages are available. If we want an installation from the default repositories, only chromium & chromedriver is left.
The chromedriver has a lot of options, that can be set. It may be necessary to tweak these options on different platforms to make headless operation work.
The chromedriver, selenium and its options change quite a lot over time. A lot of information on stackoverflow regarding chromedriver/selenium is outdated.
The deployment to Streamlit Cloud has unfortunately failed sometimes in the past. A concrete cause of the error or an informative error message could not be identified. Currently it seems to be stable on Streamlit Cloud.
To run this streamlit app on Windows, the Windows chromedriver.exe must be stored here in the root folder or added to the Windows PATH. Be aware, that the version of this chromedriver must match the version of your installed Chrome browser.
Development Setup 🛠️
In the Streamlit Cloud runtime, neither chrome, chromedriver nor geckodriver are available in the default apt package sources.
The Streamlit Cloud runtime seems to be very similar to the official docker image python:3.XX-slim-bullseye on Docker Hub, which is based on Debian Bullseye.
In this repository a Dockerfile is provided that mimics the Streamlit Cloud runtime. It can be used for local testing.
A packages.txt is provided with the following minimal content:
chromium
chromium-driver
A requirements.txt is provided with the following minimal content:
streamlit
selenium
Docker 🐋
Docker Container local
The provided Dockerfile tries to mimic the Streamlit Cloud runtime.
A revolutionary way for students to manage their time.
Description
TimeM is a web application that guilt trips high-school and college students from wasting their
precious time on social media website. A student’s impaired alertness decreases productivity
significantly due to a lack of sleep, consequently affecting their grades. Using our elegant sleep clock will
show the user at what time he/she spent time on social media websites. Our goal is for students
to focus spend their time on completing their homework, which ultimately will lead to more sleep
time for students.
Quickstart
Use step 1 below to start web application.
1. Run Simple HTTP Server
Create a Python Local Server in order to see Polymer elements on the webpage.
Simply run the command below:
Update 2018: This project has been put on hold until Trading View released web hook support, as the SMS notifications were not open-ended and as such would expire, which would cause you to lose money because trades would cease if you forgot to renew the SMS hook, which was too manually fragile to justify maintaining.
Trading View strategies are added to the the Trading View interface, to see how they perform via Trading View’s backtesting feature
Trading View alerts are created via the study that accompanies the strategy (as Trading View strategies do not support alerts)
Use Trading View’s Server-Side SMS Alert feature to send the alert to a Twilio number
Use the Twilio number to send the message via Web Hook to a Firebase Function that parses it
Use the Firebase Function to act upon the alert message, with the usual intention of placing a trade via one or more intended Exchange APIs
That is to say, this is already a working solution for placing automated trades with various exchanges via Trading View strategies.
With enough effort, it will also accomplish:
Storage of trade data for historical reporting of profit and loss against strategies and securities
Storage of market data for more advanced strategies that can be operated independently of Trading View
An app that allows users to register, browse strategy performance, and connect their portfolios to the strategies
A marketplace for acquiring and renting strategies (%/$ on profits/month/trade)
Public/Private user profiles, automated trade performance, and portfolio size
Difficulties with this vision are:
Trading View offers no API for
injecting strategies against securities
injecting alerts on those strategies
In order for Trading View to successfully send an alert, it requires a perfect balance of:
Correct strategy and study setup, including correct input options
Correct chart and change duration setup
Correct connection between the strategy and the chart for correct alert setup
Ensuring that none of this automation configuration changes in the process of just using trading view for everyday things
A Premium Trading View plan in order to get access to their Server-Side SMS Alert feature, the only alert feature that sends alerts even when you have Trading View closed
Trading View has a few unexpected features/bugs:
Backtesting on Renko charts places realtime virtual trades at non-realtime prices, producing falsely optimal results
valuewhen(change(series), series, ForLoopIteration) does not seem to work as expected when inside a for loop, it seems to always produce the same result
There is no logging or debugging in pine script, which makes figuring out the unexpected implausible
This would be assisted by either:
Moving away from Trading View
This may happen in 2018, as currently other backtesting solutions seem of alpha quality
This would also allow potentially more advanced trading strategies, such as AI based ones
Working with Trading View to solve the earlier issues
A combination of both of the above; where this service evolves into an automated trading empire, where the strategies is a seperate empire which connects to this one, allowing any strategy service to connect to this user-facing (automated) trade placement solution
How to help:
Trading View strategies
You can help me improve my current strategies
You can write new strategies and add them
More exchanges
Feel free to add support for more exchanges, I will happily merge them
User-facing app
We can work together on the user facing app, that will allow users to register, add their exchanges, and view performance
Review
You can review what has been done and help me improve it, especially from a security perspective
Investment
You can help me connect a team/location/mentors/funds to build this out, make it into a product and a business, and hopefully double every user’s money while they sleep
I am not sure open-sourcing of this is a good or bad idea, as it could be I am naive, so here are my thoughts:
Bad idea:
someone more familiar with big finance takes an optimal strategy stored here, and sells it to big finance making millions of dollars without me, ruining my return on investment
some assumptions or code in this project could be fatally flawed, and someone decides to exploit it
Neutral idea:
a larger team takes the ambitions here, and makes the project happen without me — neutral return on investment, as I will still benefit from their result, even if my own investment was at a loss
individuals and firms may not trust the project with their money, unless they too can inspect its operations, which open-source provides – however, they could just fork it, and setup their own product based off it, using their big brand name as leverage
Good idea:
someone more familiar with big finance notices the potential in the project, and reaches out to help make it happen, offering expertise and/or funding and/or team suggestions
others also interested in this area help flesh this out, where one’s expertise in one area compliments another’s naiveity – this could be accomplished without open-source, but to do it without open-source, I’ll need to hire people, of which, I’ll need to find people to hire (first problem), and then to hire them (second problem)
some assumptions or code in this project could be fatally flawed, and someone else can spot it before it becomes more of a liability
the progress of strategies and implementation can be shared with support groups and other interested parties, to faciliate improvements and collaboration
See the INSTALL.md guide for how to setup this project yourself. Once there is a user-facing app, this will not be needed.
Disclaimer
This software is provided “as is”, without warranty of any kind, express or implied, including but not limited to the warranties of merchantability, fitness for a particular purpose and non-infringement. In no event shall the authors, copyright holders, or Bevry be liable for any claim, damages or other liability, whether in an action of contract, tort or otherwise, arising from, out of or in connection with the software or the use or other dealings in the software.
Use the software at your own risk. You are responsible for your own money. Past performance is not necessarily indicative of future results.
The authors and all affiliates assume no responsibility for your trading results.
This program is free software: you can redistribute it and/or modify
it under the terms of the GNU Affero General Public License as
published by the Free Software Foundation, either version 3 of the
License, or (at your option) any later version.
This program is distributed in the hope that it will be useful,
but WITHOUT ANY WARRANTY; without even the implied warranty of
MERCHANTABILITY or FITNESS FOR A PARTICULAR PURPOSE. See the
GNU Affero General Public License for more details.
You should have received a copy of the GNU Affero General Public License
along with this program. If not, see https://www.gnu.org/licenses/.
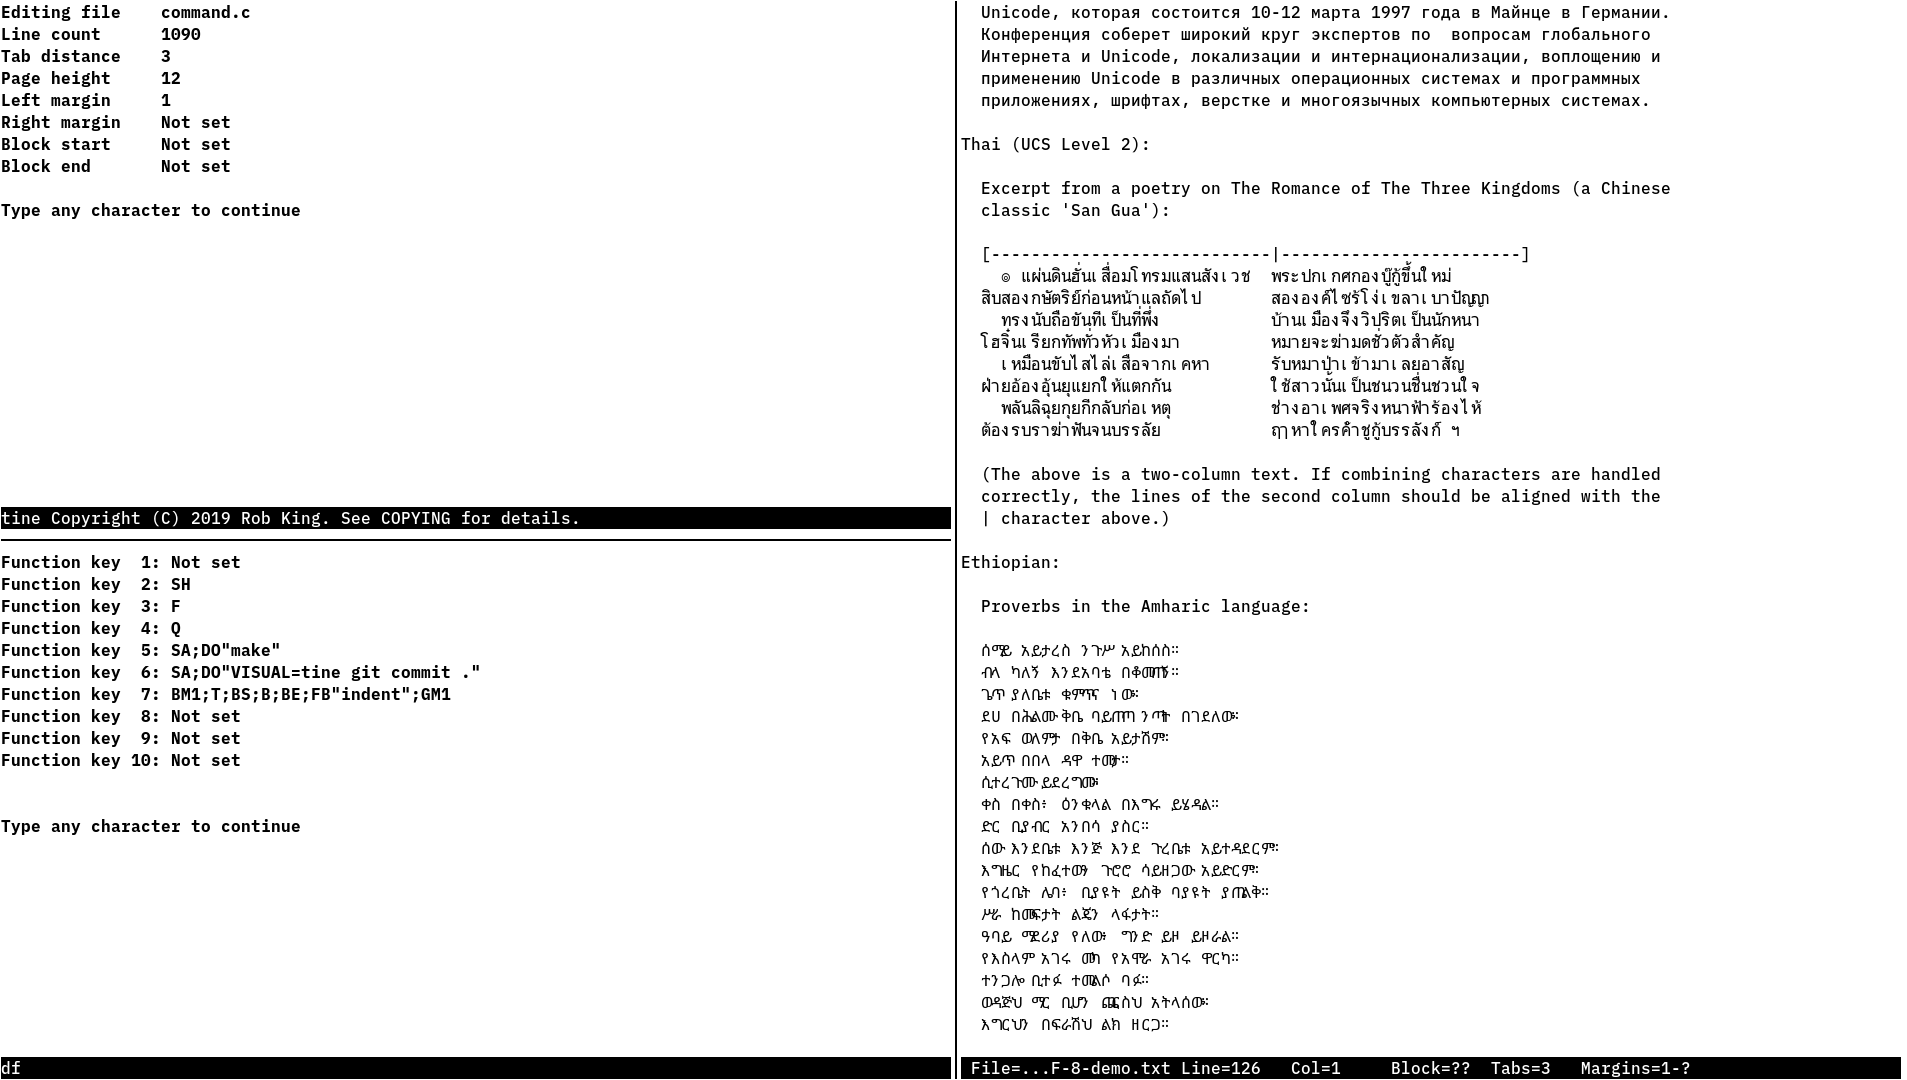
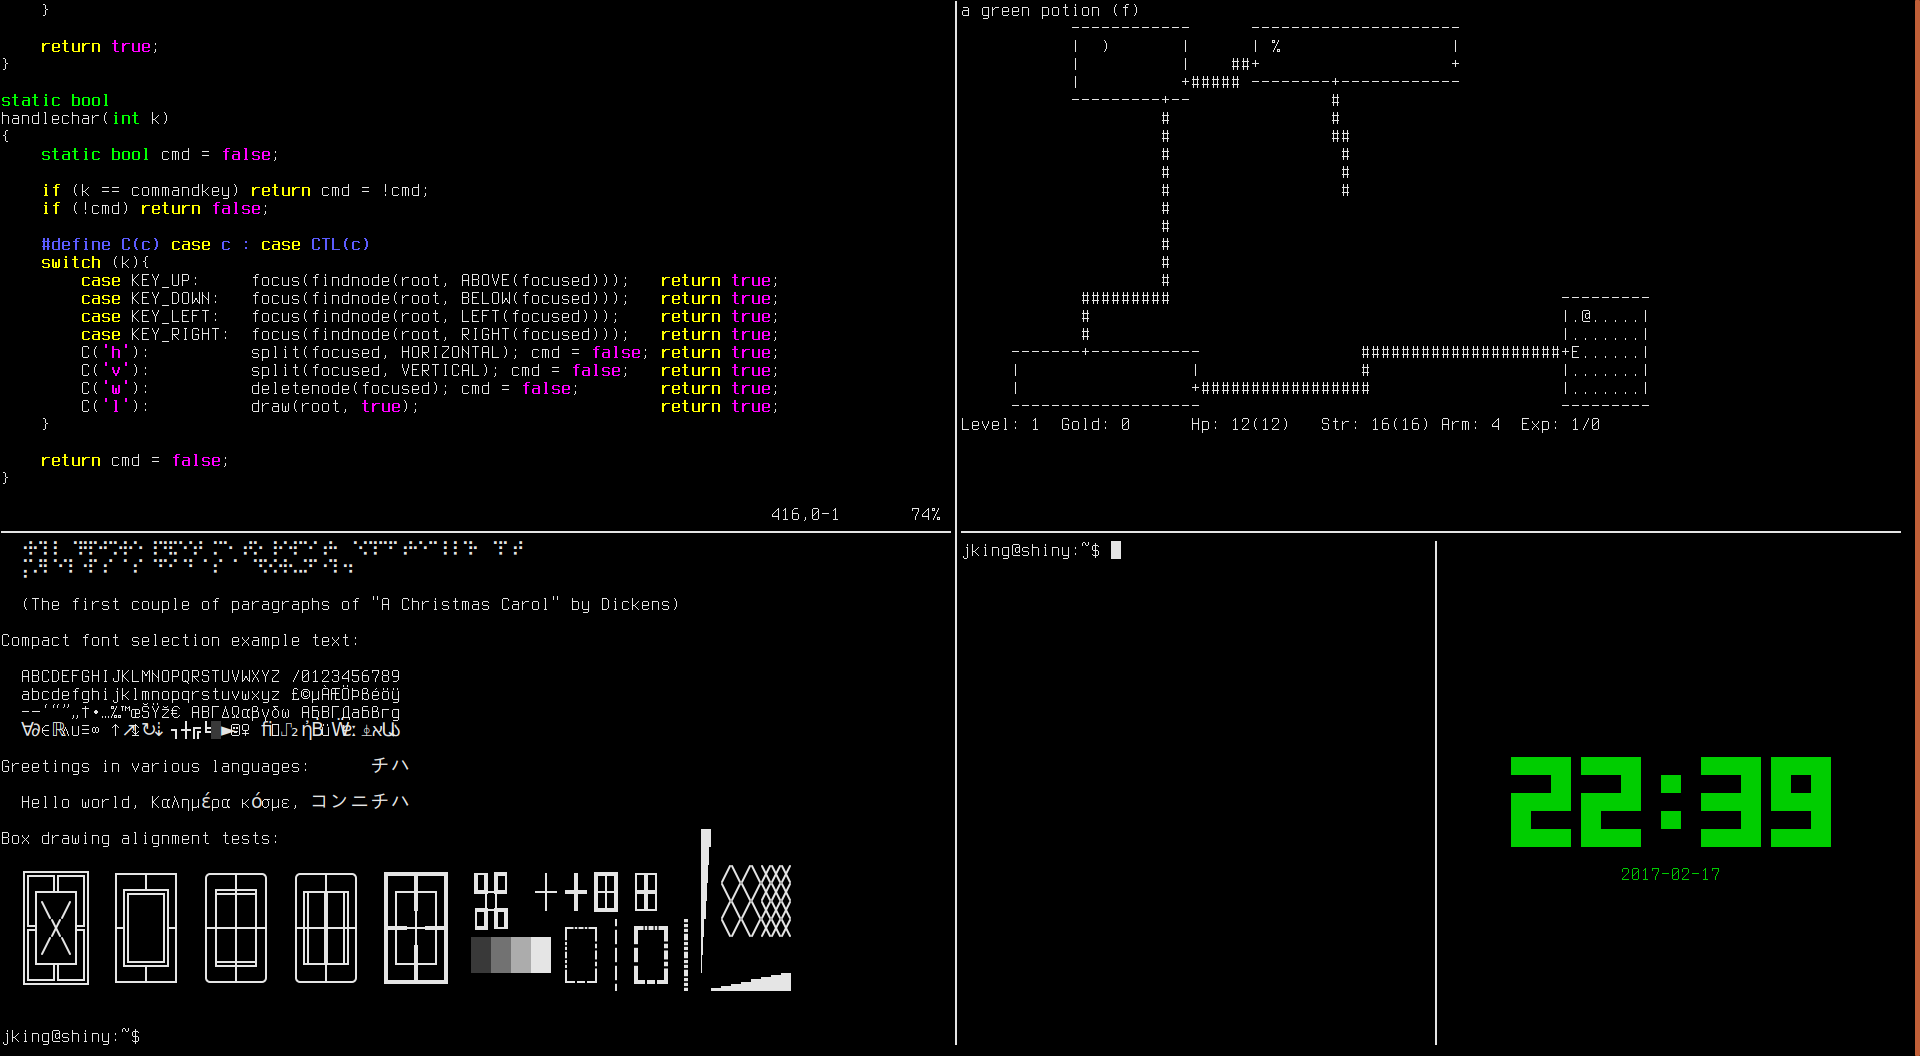
mtm is the Micro Terminal Multiplexer, a terminal multiplexer.
It has four major features/principles:
Simplicity
There are only a few commands, two of which are hardly ever used.
There are no modes, no dozens of commands, no crazy feature list.
Compatibility
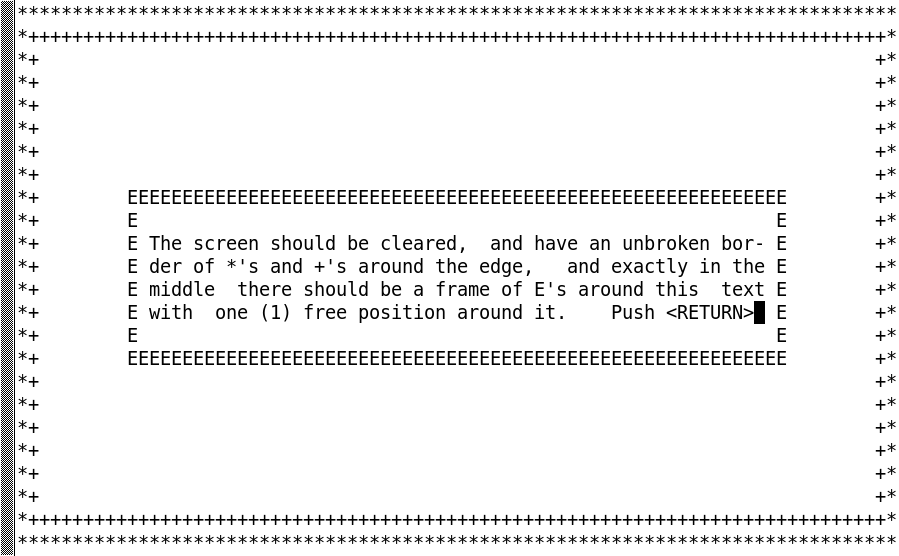
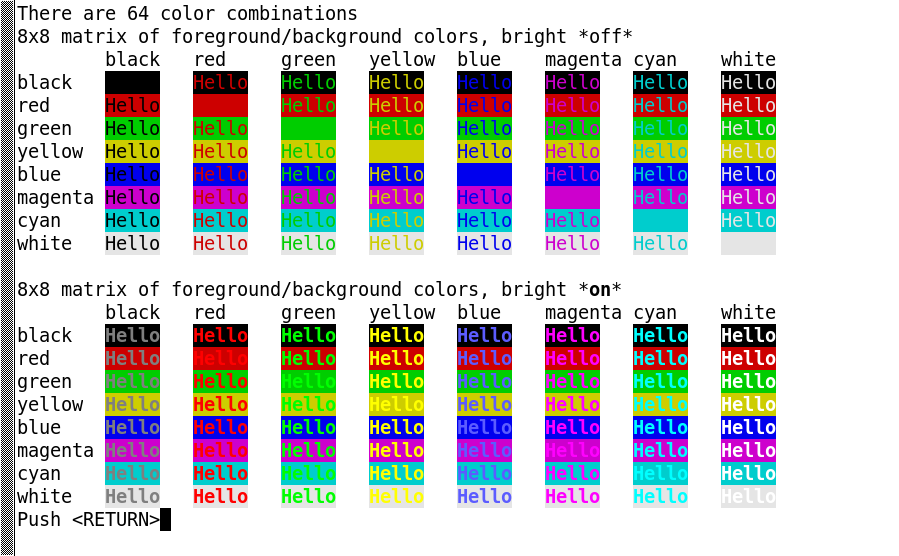
mtm emulates a classic ANSI text terminal. That means it should
work out of the box on essentially all terminfo/termcap-based systems
(even pretty old ones), without needing to install a new termcap entry.
Size
mtm is small.
The entire project is around 1000 lines of code.
Stability
mtm is “finished” as it is now. You don’t need to worry about it
changing on you unexpectedly. The only changes that can happen at
this point are:
You need ncursesw.
If you want to support terminal resizing, ncursesw needs to be
compiled with its internal SIGWINCH handler; this is true for most
precompiled distributions. Other curses implementations might work,
but have not been tested.
Edit the variables at the top of the Makefile if you need to
(you probably don’t).
If you want to change the default keybindings or other compile-time flags,
copy config.def.h to config.h and edit the copy. Otherwise the build
process will use the defaults.
Run:
make
or:
make CURSESLIB=curses
or:
make HEADERS='-DNCURSESW_INCLUDE_H="<ncurses.h>"'
whichever works for you.
Run make install if desired.
Usage
Usage is simple:
mtm [-T NAME] [-t NAME] [-c KEY]
The -T flag tells mtm to assume a different kind of host terminal.
The -t flag tells mtm what terminal type to advertise itself as.
Note that this doesn’t change how mtm interprets control sequences; it
simply controls what the TERM environment variable is set to.
The -c flag lets you specify a keyboard character to use as the “command
prefix” for mtm when modified with control (see below). By default,
this is g.
Once inside mtm, things pretty much work like any other terminal. However,
mtm lets you split up the terminal into multiple virtual terminals.
At any given moment, exactly one virtual terminal is focused. It is
to this terminal that keyboad input is sent. The focused terminal is
indicated by the location of the cursor.
The following commands are recognized in mtm, when preceded by the command
prefix (by default ctrl-g):
Up/Down/Left/Right Arrow
Focus the virtual terminal above/below/to the left of/to the right of
the currently focused terminal.
o
Focus the previously-focused virtual terminal.
h / v
Split the focused virtual terminal in half horizontally/vertically,
creating a new virtual terminal to the right/below. The new virtual
terminal is focused.
w
Delete the focused virtual terminal. Some other nearby virtual
terminal will become focused if there are any left. mtm will exit
once all virtual terminals are closed. Virtual terminals will also
close if the program started inside them exits.
l
Redraw the screen.
PgUp/PgDown/End
Scroll the screen back/forward half a screenful, or recenter the
screen on the actual terminal.
That’s it. There aren’t dozens of commands, there are no modes, there’s
nothing else to learn.
(Note that these keybindings can be changed at compile time.)
(Note that you only need to read this section if you’re curious. mtm should
just work out-of-the-box for you, thanks to the efforts of the various
hackers over the years to make terminal-independence a reality.)
By default, mtm advertises itself as a screen-bce terminal. This is what GNU
screen and tmux advertise themselves as, and is a well-known terminal
type that has been in the default terminfo database for decades.
(Note that this should not be taken to imply that anyone involved in the
GNU screen or tmux projects endorses or otherwise has anything to do
with mtm, and vice-versa. Their work is excellent, though, and you should
definitely check it out.)
The (optional!) mtm Terminal Types
mtm comes with a terminfo description file called mtm.ti. This file
describes all of the features supported by mtm.
If you want to install this terminal type, use the tic compiler that
comes with ncurses:
tic -s -x mtm.ti
or simply:
make install-terminfo
This will install the following terminal types:
mtm
This terminal type supports all of the features of mtm, but with
the default 8 “ANSI” colors only.
mtm-256color
Note that mtm is not magic and cannot actually display more colors
than the host terminal supports.
mtm-noutf
This terminal type supports everything the mtm terminal type does,
but does not advertise UTF8 capability.
That command will compile and install the terminfo entry. After doing so,
calling mtm with -t mtm:
mtm -t mtm
will instruct programs to use that terminfo entry.
You can, of course, replace mtm with any of the other above terminal
types.
Using these terminfo entries allows programs to use the full power of mtm’s
terminal emulation, but it is entirely optional. A primary design goal
of mtm was for it to be completely usable on systems that didn’t have the
mtm terminfo entry installed. By default, mtm advertises itself as the
widely-available screen-bce terminal type.
This program is free software: you can redistribute it and/or modify
it under the terms of the GNU General Public License as published by
the Free Software Foundation, either version 3 of the License, or
(at your option) any later version.
This program is distributed in the hope that it will be useful,
but WITHOUT ANY WARRANTY; without even the implied warranty of
MERCHANTABILITY or FITNESS FOR A PARTICULAR PURPOSE. See the
GNU General Public License for more details.
You should have received a copy of the GNU General Public License
along with this program. If not, see <http://www.gnu.org/licenses/>.
mtm is the Micro Terminal Multiplexer, a terminal multiplexer.
It has four major features/principles:
Simplicity
There are only a few commands, two of which are hardly ever used.
There are no modes, no dozens of commands, no crazy feature list.
Compatibility
mtm emulates a classic ANSI text terminal. That means it should
work out of the box on essentially all terminfo/termcap-based systems
(even pretty old ones), without needing to install a new termcap entry.
Size
mtm is small.
The entire project is around 1000 lines of code.
Stability
mtm is “finished” as it is now. You don’t need to worry about it
changing on you unexpectedly. The only changes that can happen at
this point are:
You need ncursesw.
If you want to support terminal resizing, ncursesw needs to be
compiled with its internal SIGWINCH handler; this is true for most
precompiled distributions. Other curses implementations might work,
but have not been tested.
Edit the variables at the top of the Makefile if you need to
(you probably don’t).
If you want to change the default keybindings or other compile-time flags,
copy config.def.h to config.h and edit the copy. Otherwise the build
process will use the defaults.
Run:
make
or:
make CURSESLIB=curses
or:
make HEADERS='-DNCURSESW_INCLUDE_H="<ncurses.h>"'
whichever works for you.
Run make install if desired.
Usage
Usage is simple:
mtm [-T NAME] [-t NAME] [-c KEY]
The -T flag tells mtm to assume a different kind of host terminal.
The -t flag tells mtm what terminal type to advertise itself as.
Note that this doesn’t change how mtm interprets control sequences; it
simply controls what the TERM environment variable is set to.
The -c flag lets you specify a keyboard character to use as the “command
prefix” for mtm when modified with control (see below). By default,
this is g.
Once inside mtm, things pretty much work like any other terminal. However,
mtm lets you split up the terminal into multiple virtual terminals.
At any given moment, exactly one virtual terminal is focused. It is
to this terminal that keyboad input is sent. The focused terminal is
indicated by the location of the cursor.
The following commands are recognized in mtm, when preceded by the command
prefix (by default ctrl-g):
Up/Down/Left/Right Arrow
Focus the virtual terminal above/below/to the left of/to the right of
the currently focused terminal.
o
Focus the previously-focused virtual terminal.
h / v
Split the focused virtual terminal in half horizontally/vertically,
creating a new virtual terminal to the right/below. The new virtual
terminal is focused.
w
Delete the focused virtual terminal. Some other nearby virtual
terminal will become focused if there are any left. mtm will exit
once all virtual terminals are closed. Virtual terminals will also
close if the program started inside them exits.
l
Redraw the screen.
PgUp/PgDown/End
Scroll the screen back/forward half a screenful, or recenter the
screen on the actual terminal.
That’s it. There aren’t dozens of commands, there are no modes, there’s
nothing else to learn.
(Note that these keybindings can be changed at compile time.)
(Note that you only need to read this section if you’re curious. mtm should
just work out-of-the-box for you, thanks to the efforts of the various
hackers over the years to make terminal-independence a reality.)
By default, mtm advertises itself as a screen-bce terminal. This is what GNU
screen and tmux advertise themselves as, and is a well-known terminal
type that has been in the default terminfo database for decades.
(Note that this should not be taken to imply that anyone involved in the
GNU screen or tmux projects endorses or otherwise has anything to do
with mtm, and vice-versa. Their work is excellent, though, and you should
definitely check it out.)
The (optional!) mtm Terminal Types
mtm comes with a terminfo description file called mtm.ti. This file
describes all of the features supported by mtm.
If you want to install this terminal type, use the tic compiler that
comes with ncurses:
tic -s -x mtm.ti
or simply:
make install-terminfo
This will install the following terminal types:
mtm
This terminal type supports all of the features of mtm, but with
the default 8 “ANSI” colors only.
mtm-256color
Note that mtm is not magic and cannot actually display more colors
than the host terminal supports.
mtm-noutf
This terminal type supports everything the mtm terminal type does,
but does not advertise UTF8 capability.
That command will compile and install the terminfo entry. After doing so,
calling mtm with -t mtm:
mtm -t mtm
will instruct programs to use that terminfo entry.
You can, of course, replace mtm with any of the other above terminal
types.
Using these terminfo entries allows programs to use the full power of mtm’s
terminal emulation, but it is entirely optional. A primary design goal
of mtm was for it to be completely usable on systems that didn’t have the
mtm terminfo entry installed. By default, mtm advertises itself as the
widely-available screen-bce terminal type.
This program is free software: you can redistribute it and/or modify
it under the terms of the GNU General Public License as published by
the Free Software Foundation, either version 3 of the License, or
(at your option) any later version.
This program is distributed in the hope that it will be useful,
but WITHOUT ANY WARRANTY; without even the implied warranty of
MERCHANTABILITY or FITNESS FOR A PARTICULAR PURPOSE. See the
GNU General Public License for more details.
You should have received a copy of the GNU General Public License
along with this program. If not, see <http://www.gnu.org/licenses/>.